Showing posts with label organization. Show all posts

Friday, November 13, 2015

The best reasons to keep the house clean, tidy, uncluttered. It's not housekeeping, it's homemaking.

For the 2015 New Year, I resolved that I would teach my kids to pick up after themselves. Well, unlike a lot of NY resolutions, I actually worked tirelessly on this one every single day through all of 2015.

We came a long way and made a lot of progress, but are still nowhere near where I would like to be. Where would I like to be? I would like for them to pick up after themselves as though they were adult tenants renting a room in my home. When does that happen? Never? Oh, okay. Haha.

Here's what I -- as the mommy -- learned from the experience...

1. Different kids (And adults!) have different personalities ranging everywhere from the kid who needs orderliness to the kid who doesn't give a scrap. We need to show love to each other by understanding this fact about each other.

2. I don't like picking up all by myself, so why would they? So much more fun when we just decide to help each other and do it together. Many hands make light work (even if Mommy has to do the lion's share).

3. Throw something away or let something get destroyed once in a while to keep them on their toes. Hard lessons stick better than just yelling. Older kids can be old enough to be frustrated that they can't wear their favorite shirt because they didn't put it in the laundry. ;)

4. Get rid of stuff. Just have less stuff. Less to put away! Children who learn to hold loosely to material things may be better off, since relationships are the most important thing.
 
5. Last, but not least, I will not rip my hair out running around like a chicken with my head cut off to please people trying to make my house look ready for Better Homes & Gardens. 
 
My house is still really messy a lot of the time! But, we are learning what rhythms and rules work for our family right now. There's lots of room for more growth in the coming year!


Tuesday, March 11, 2014

Help with Organizing: Instructions, Product Warranties, and Receipts

If you're like me, you've struggled with what to do about all those instructions, warranties, and receipts that came with the important items in your home.
Have you ever thrown them out, only to have problems with the product down the road?
Find yourself wishing you had not tossed that warranty into the recycle bin?
Fumbling with your digital camera and can't get the settings right without the owner's manual?
Have you actually held on to all those papers, but they're cluttering up your home & you never know where to find them?!

Here's the inexpensive solution we've been using at our house for about 3 years, and it has worked rather well for us.

Supplies:
File bin or filing cabinet
Manila file folders
Hanging files
Plastic food storage bags (quart or gallon)
Felt tip pen

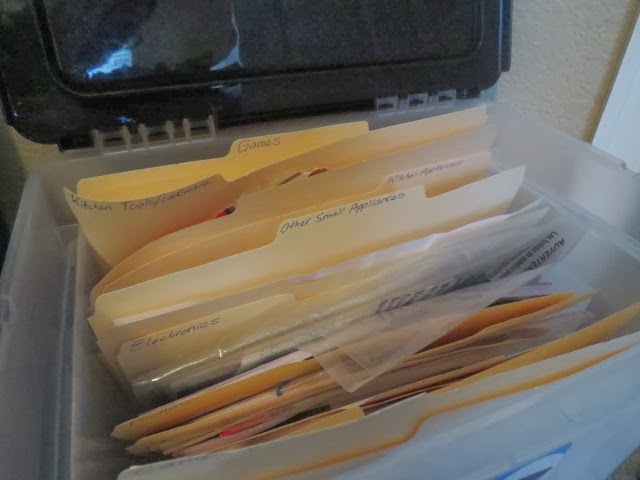
We put all the important papers related to products we own, as well as backup software discs and receipts for the really important stuff in a file bin. These files can be organized & labeled by the room you keep the item in, what type of product it is, or you can even have a separate folder labeled for each item and alphabetize them.


Here's how we've organized our bin:
Camping and Recreation Gear
Baby Gear
Pet Gear
Jewelry
Toys
Games
Tools
Furniture
Kitchen Tools/Cookware
Kitchen Appliances
Other Small Appliances
Camera
Computer and Software
Printers
Computer Accessories
Phone
Other Small Electronics
Miscellaneous

You can label some folders this way and start using this system at your house for the cost of a quick trip to the dollar store!
Choose to specify your folders however you like specific to your situation. For example, if you have a large collection of firearms, you might sort them by pistols, shotguns, and rifles. (By the way, it is important to have written down somewhere the serial numbers in case of theft).

Staple receipts and product warranties that go with the same item together. Plastic storage bags are good if you have a tiny part, disc, or tiny slip of paper that you need to hang on to. These can also be labeled with a felt tip pen.

It's a good idea to photocopy receipts onto a standard sheet of paper, but since manufacturers may require an original receipt in order to service or replace your product you should staple them together and keep both.

Consider carefully what should and should not go in your bin, so you do not hold on to mere clutter. Do you really need to save the instructions for that basic $9 drip coffee maker that does not even boast an auto function or clock? You may not need to save a warranty for an item that was very inexpensive to begin with, if you're sure you would not try to contact the manufacturer if it were to break. Remember, the point is try to clear your home of clutter.

Examples of some other things that should not go in this bin might include instructions for using your jumper cables (unless you're a mechanic, keep them in the car!), or instructions for setting up your tent (keep it with the tent!).

This system should work well for most households, but only if you maintain it.
  • Put the instructions in the file as soon as you've finished using them. 
  • Clean out the file bin at least once year, tossing anything that goes with...say...and appliance you no longer own. I try to clean out all my files between the New Year and tax season.
Now, hopefully next time the washing machine breaks down, or you need to re-program your remote, you'll know just where to look.

..........
A place for everything, and everything in it's place. Now doesn't that feel better? Good luck, y'all!

Thursday, October 10, 2013

Upcycling a Crib into a Light (Tracing) Table

This crib/toddler bed was picked up at a garage sale for $5. We got our use out of it, then I was able to turn it into a light table for tracing, as well a place to stash my paper. I do a lot of tracing for craft projects, so this was a great way for me to keep an old crib out of the landfill a while longer (and save a bunch of money with not having to purchase a light table from an art supply dealer). 
If you're handy, you can make one, too!
 I cut one of the side rails in half. I made it into a pyramid shape. You could staple canvas or almost any sturdy material here, or use real hinges.

 Once my straps were on, I adjusted the length so it would stand at just the right height.
 Here it is with the pads of sketch paper. 
This could be fitted with tiny hooks or pegs to hold ribbon, thread, bobbins, 
or even mounted to the wall.

 I put an old TV tray under the glass to hold my lamp, but you could come up with infinite possibilities and types of lighting solutions.
 Using pliers to bend the hook parts, I removed the "springs" from the old bed spring; I found a piece of glass the right size and cut a piece of wood to fit into the frame of the bed spring. 
I mounted it at and angle with screws and wire ties for a temporary fix, 
but with the right hardware, it could be made to be adjustable to any height/angle.
 I love using this, and it cost me pretty much $0!

Friday, June 14, 2013

DIY Modular Spice Rack

I've found so many uses for food boxes. This is my quick, easy storage solution that cost me absolutely nothing. I needed to clear some counter space in my kitchen. I had been storing my spices in a 3-drawer plastic bin intended for scrapbook paper. Since we won't be staying in this apartment for very much longer, I needed an inexpensive, temporary solution to clear clutter off the countertops. We're always thinking of ways to reuse and upcycle at our house..


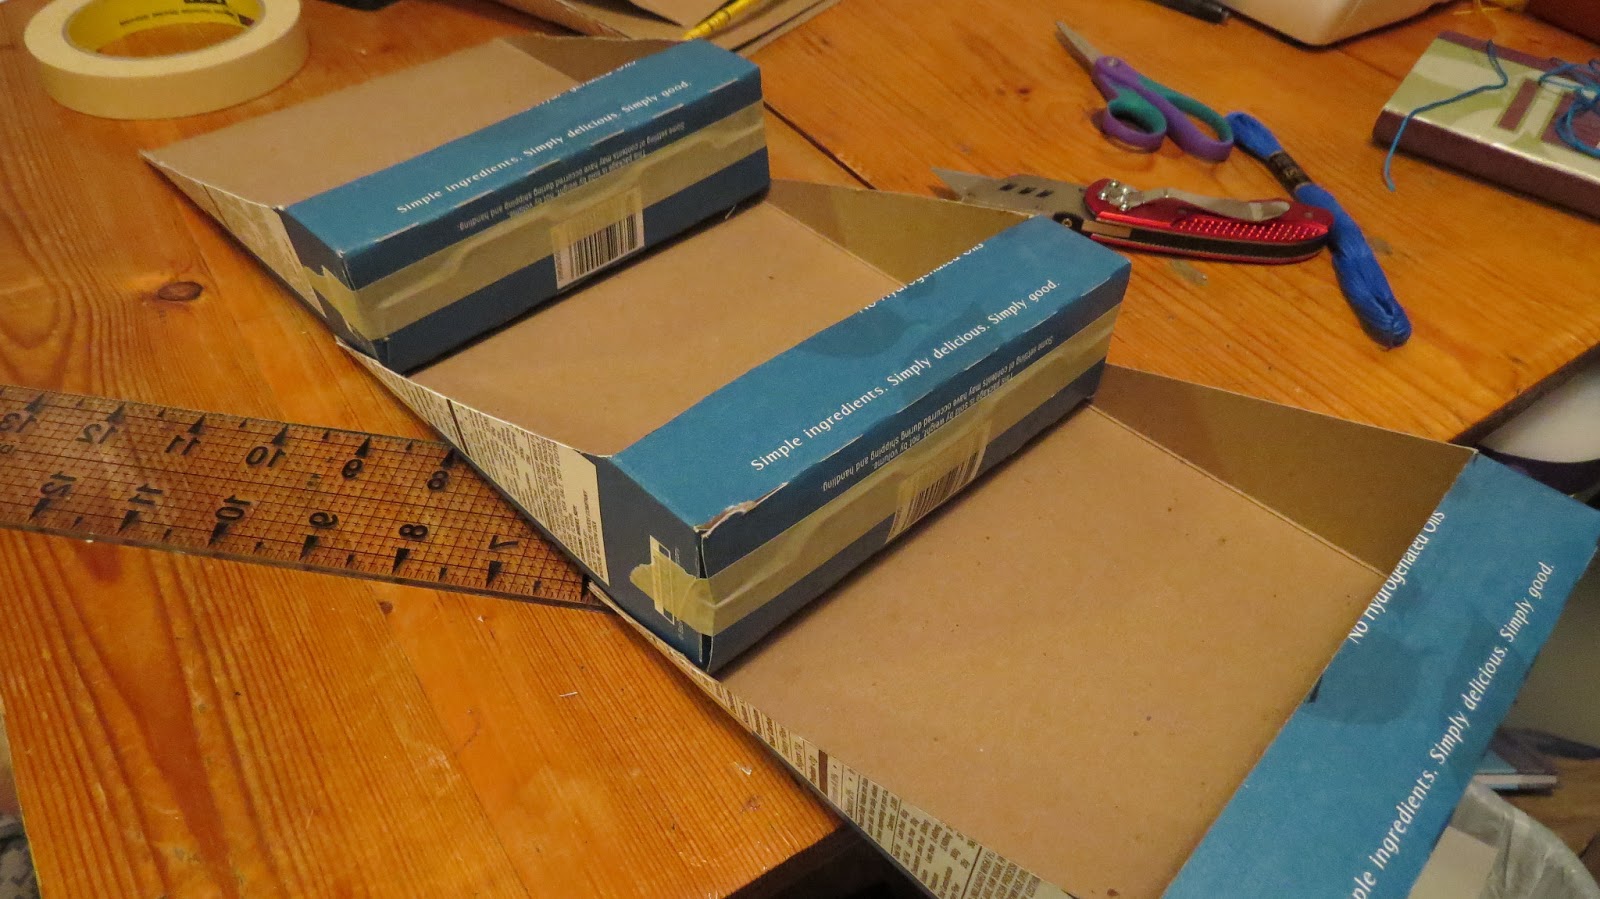
I taped the bottom of a cookie box shut.
  I measured 1 1/4 inch from the bottom of the box, and used a knife to carefully cut a slit  in the box. (I chose 1 1/4 inches, because that seemed about just the right amount to still be able to read the labels on the spice containers)
 I used a straight edge to mark a line at an angle from my slit toward the opposite corner on the top of the box.
 I carefully cut along that line, using my knife.
 I folded the flap at the top of the box backward, and taped it down. This would give me a double thickness through which to nail the top edge of the box to the wall.
 Deciding how I want to arrange my boxes on the wall...
 Then, I used a couple of finishing tacks to mount my new spice rack to the wall. Done!
Totally customizable, and absolutely free. You could also nail them to the inside of a cabinet door, so they're out of sight. The boxes could easily be spray painted or covered with decorative paper to pretty them up a little. This concept could work with almost any box and could be used for infinite possibilities. Use a cereal box for children's books, a small box for pens etc...

...And a great way to avoid throwing something in the trash if recycling isn't available for these types of containers in your area.

If you've used these in a fun way in your home, please share your ideas or photos with me!