Friday, October 11, 2013

Will a Britax Roundabout 55 fit in my 2009 Honda Fit?

Short answer: Yes!

Now for a brief review of the Britax Roundabout 55.

After wrestling & fighting with our current convertible child restraint (an Alpha Omega Elite I bought in 2009) and scraping up my hands every time to install it with the vehicle seat belt (the LATCH anchors no longer maintained tension), I broke down and decided we need a new car seat for my daughter. If it can't be installed properly, don't use it.

I looked at reviews online (mainly on Amazon) and took advice from friends. I narrowed it down to these three: Graco MyRide 65, Chicco NextFit, or Britax Roundabout 55. I ended up picking the Roundabout, because there wasn't anything in the consumer reviews about it not fitting in a smaller vehicle. Even though we're thinking about getting a bigger car, I wanted to be absolutely certain I would have no trouble at all getting this in our current car or in a friend's car when we travel. Other key factors were: desired to keep my 2 yr old rear-facing, brand trustworthiness, price, styling, height/weight fit, ease-of-installation, and type of anchor mechanism.

The Britax arrived in the mail today, and installation was a breeze compared to our old Alpha Omega. I'm very satisfied. My daughter couldn't wait to get in and try it out. With the Roundabout rear-facing, I can actually move the front seat aaaaall the way back without interfering with the child restraint! Before, we had to move it up so there was only just enough room for an adult to sit up front.


 The LATCH anchor mechanisms are the type with a button up top, so I don't have to dig to depress the anchor.


See that metal bar under the shell of the seat? 
This seat has a bar upon which the LATCH tethers simply slide up/down, 
so when it's time to switch to forward-facing, I won't have to re-thread the belt path.


 Here it is: all installed in our '09 Honda Fit! It will work great, even  with my 6' 2" husband in the front seat. I hope this seat works out for us, because it's SO much easier to use!
(P.S. It comes in different colors, too!
P.P.S. Made in the USA!)

Thursday, October 10, 2013

Upcycling a Crib into a Light (Tracing) Table

This crib/toddler bed was picked up at a garage sale for $5. We got our use out of it, then I was able to turn it into a light table for tracing, as well a place to stash my paper. I do a lot of tracing for craft projects, so this was a great way for me to keep an old crib out of the landfill a while longer (and save a bunch of money with not having to purchase a light table from an art supply dealer). 
If you're handy, you can make one, too!
 I cut one of the side rails in half. I made it into a pyramid shape. You could staple canvas or almost any sturdy material here, or use real hinges.

 Once my straps were on, I adjusted the length so it would stand at just the right height.
 Here it is with the pads of sketch paper. 
This could be fitted with tiny hooks or pegs to hold ribbon, thread, bobbins, 
or even mounted to the wall.

 I put an old TV tray under the glass to hold my lamp, but you could come up with infinite possibilities and types of lighting solutions.
 Using pliers to bend the hook parts, I removed the "springs" from the old bed spring; I found a piece of glass the right size and cut a piece of wood to fit into the frame of the bed spring. 
I mounted it at and angle with screws and wire ties for a temporary fix, 
but with the right hardware, it could be made to be adjustable to any height/angle.
 I love using this, and it cost me pretty much $0!

Wednesday, June 26, 2013

Nature Shelf for Kids

I keep learning so much about the importance of letting kids run around outdoors and be creative.
To encourage outdoor exploration for my preschooler, I hung up a "nature shelf" of his very own.
Ours is made from reclaimed wood with a couple of brackets to attach it to the wall. I also added a mirror above it just for fun (which is an old medicine cabinet door turned on it's side).
Now we have a place to put his little objects. He loves finding interesting little things in the back yard to display!


Friday, June 14, 2013

DIY Modular Spice Rack

I've found so many uses for food boxes. This is my quick, easy storage solution that cost me absolutely nothing. I needed to clear some counter space in my kitchen. I had been storing my spices in a 3-drawer plastic bin intended for scrapbook paper. Since we won't be staying in this apartment for very much longer, I needed an inexpensive, temporary solution to clear clutter off the countertops. We're always thinking of ways to reuse and upcycle at our house..


I taped the bottom of a cookie box shut.
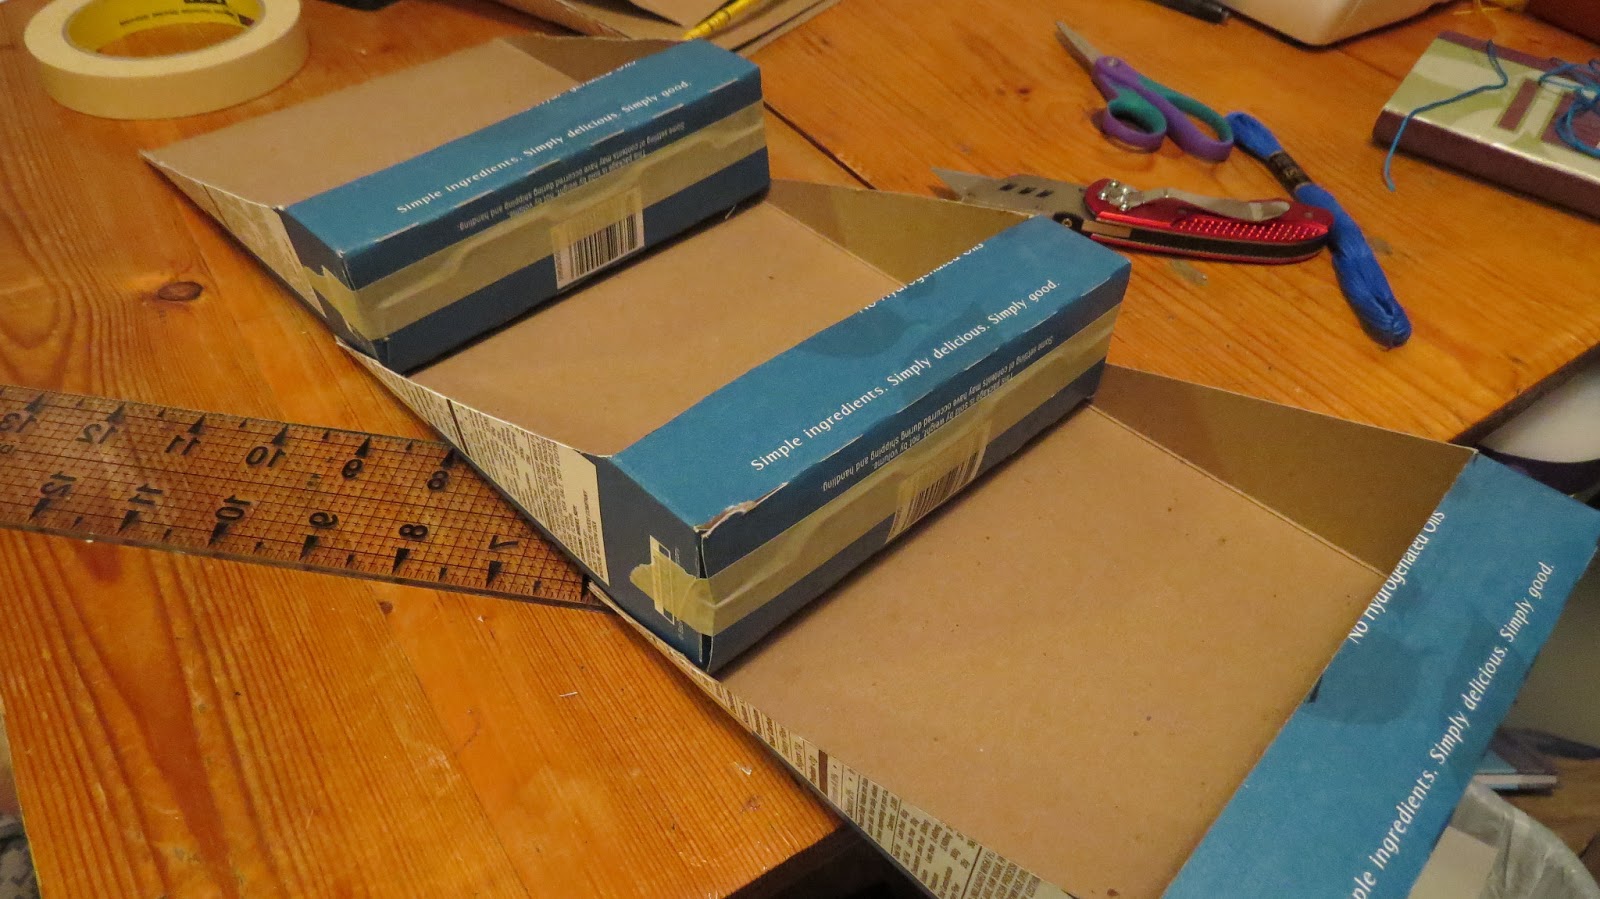
  I measured 1 1/4 inch from the bottom of the box, and used a knife to carefully cut a slit  in the box. (I chose 1 1/4 inches, because that seemed about just the right amount to still be able to read the labels on the spice containers)
 I used a straight edge to mark a line at an angle from my slit toward the opposite corner on the top of the box.
 I carefully cut along that line, using my knife.
 I folded the flap at the top of the box backward, and taped it down. This would give me a double thickness through which to nail the top edge of the box to the wall.
 Deciding how I want to arrange my boxes on the wall...
 Then, I used a couple of finishing tacks to mount my new spice rack to the wall. Done!
Totally customizable, and absolutely free. You could also nail them to the inside of a cabinet door, so they're out of sight. The boxes could easily be spray painted or covered with decorative paper to pretty them up a little. This concept could work with almost any box and could be used for infinite possibilities. Use a cereal box for children's books, a small box for pens etc...

...And a great way to avoid throwing something in the trash if recycling isn't available for these types of containers in your area.

If you've used these in a fun way in your home, please share your ideas or photos with me!